Zimbra Mail Server
22 comments
Zimbra is an email and collaboration platform developed by Zimbra, Inc. It provides a suite of communication and collaboration tools, including email, calendaring, contacts, document sharing, and task management. Zimbra can be deployed as an on-premises solution or in the cloud.
Key features of Zimbra include:
- Email: Zimbra offers a robust email system with features such as conversation view, tagging, filters, and powerful search capabilities.
- Calendar: Users can manage their schedules, appointments, and meetings with Zimbra's calendar functionality. It supports shared calendars, scheduling, reminders, and integration with other calendar applications.
- Contacts: Zimbra allows users to organize and manage their contacts efficiently. It supports contact groups, contact sharing, and synchronization with other contact management tools.
- Document Collaboration: Zimbra includes document sharing and collaboration features, enabling users to create, edit, and share documents within the platform. It supports real-time document editing and version control.
- Task Management: Users can create and manage tasks and to-do lists within Zimbra. It offers features such as task prioritization, deadlines, and task assignments.
- Mobile Access: Zimbra provides mobile-friendly interfaces and supports synchronization with mobile devices, allowing users to access their email, calendar, contacts, and documents from anywhere.
- Security: Zimbra offers various security features, including encryption, anti-spam, anti-virus, and access controls, to ensure the privacy and integrity of communication and data.
Zimbra is popular among businesses, educational institutions, and service providers due to its robust features, scalability, and flexibility. It competes with other email and collaboration platforms such as Microsoft Exchange, Google Workspace (formerly G Suite), and IBM Notes (formerly Lotus Notes).
DNS Setup
You need to create few records for domain to get started. They are as follows.
Type    Host    Value
A   @   Your IP address
A   mail    Your IP address
MX  @   mail.yourdomain.com 10
TXT @   v=spf1 a mx ip4:138.68.14.182 ~all
TXT _dmarc  “v=DMARC1;p=none;sp=none;pct=100;adkim=r;aspf=r;rua=mailto:mail@Yourdomain.com;ruf=mailto:mail@Yourdomain.com;ri=86400;fo=1”
Set up zimbra mail server on Ubuntu
Update your system packages before installations
sudo apt-get update
sudo apt-get upgrade
Download and run the script
curl -k https://raw.githubusercontent.com/imanudin11/zimbra-auto-install/master/setup-zimbra-ubuntu18.sh > /tmp/setup-zimbra-ubuntu18.sh
chmod +x /tmp/setup-zimbra-ubuntu18.sh
/tmp/setup-zimbra-ubuntu18.sh
The script will ask for the hostname, domain, and IP address that will be used by Zimbra. The following is an example answer
Now, you can install Zimbra. Download, extract, and run install.sh script
cd /opt/
wget -c https://s3.beezim.fr/beebot/upload/1a4ba286-a177-4c02-9757-3adc42ef9e02/zcs-9.0.0_GA_1.UBUNTU18_64.20200416221446.tgz
tar -zxvf zcs-9.0.0_GA_1.UBUNTU18_64.20200416221446.tgz
cd zcs-9.0.0_GA_1.UBUNTU18_64.20200416221446
./install.sh
Once we run above install script then we will get text-based installation wizard, to Accept the license, press Y
Do you agree with the terms of the software license agreement? [N] y
Use Zimbra’s package repository [Y] y
After pressing Y, it will download the Zimbra related packages and it can take time depending upon on your internet speed.
Once all the Zimbra packages are installed in the backend then we will get the below window,
if you get a message like below, press enter or type Yes and change the domain name
DNS ERROR resolving MX for mail.xyz.com
It is suggested that the domain name have an MX record configured in DNS
Change domain name? [Yes] Yes
Create domain: [mail.xyz.com] xyz.com
   1) Status:                                  Enabled
   2) Create Admin User:                       yes
   3) Admin user to create:                    admin@mail.centos7.lan
** 4) Admin Password                           UNSET
   5) Anti-virus quarantine user:              virus-quarantine.7xi47__k@mail.centos7.lan
   6) Enable automated spam training:          yes
   7) Spam training user:                      spam.wasleuiv@mail.centos7.lan
   8) Non-spam(Ham) training user:             ham.wzmkmrkq@mail.centos7.lan
   9) SMTP host:                               mail.centos7.lan
  10) Web server HTTP port:                    8080
  11) Web server HTTPS port:                   8443
  12) Web server mode:                         https
  13) IMAP server port:                        7143
  14) IMAP server SSL port:                    7993
  15) POP server port:                         7110
  16) POP server SSL port:                     7995
  17) Use spell check server:                  yes
  18) Spell server URL:                        http://mail.centos7.lan:7780/aspell.php
  19) Enable version update checks:            TRUE
  20) Enable version update notifications:     TRUE
  21) Version update notification email:       admin@mail.centos7.lan
  22) Version update source email:             admin@mail.centos7.lan
  23) Install mailstore (service webapp):      yes
  24) Install UI (zimbra,zimbraAdmin webapps): yes

Select, or 'r' for previous menu [r] 4 # Select 4 to set admin password Password for admin@mail.centos7.lan (min 6 characters): [54mE0RmqN] enter admin password here
Now Press 7 and then 4 to set admin user password,
    Main menu

   1) Common Configuration:
   2) zimbra-ldap:                             Enabled
   3) zimbra-logger:                           Enabled
   4) zimbra-mta:                              Enabled
   5) zimbra-dnscache:                         Enabled
   6) zimbra-snmp:                             Enabled
   7) zimbra-store:                            Enabled
   8) zimbra-spell:                            Enabled
   9) zimbra-proxy:                            Enabled
  10) Default Class of Service Configuration:
   s) Save config to file
   x) Expand menu
   q) Quit

*** CONFIGURATION COMPLETE - press 'a' to apply
Now press “r” to go to previous menu and then press “a” to apply the changes.
Once all the changes are applied and Zimbra related services are started then we will get the output something like below,
*** CONFIGURATION COMPLETE - press 'a' to apply
Select from menu, or press 'a' to apply config (? - help) a
Save configuration data to a file? [Yes] Yes
Save config in file: [/opt/zimbra/config.1450] press key enter
Saving config in /opt/zimbra/config.1450...done.
The system will be modified - continue? [No] Yes
Operations logged to /tmp/zmsetup.20200619-013402.log
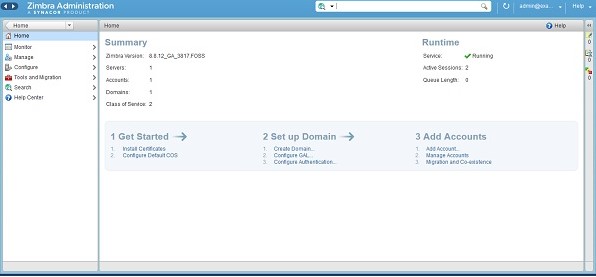
Access Zimbra Admin Portal & Web Mail Client
To access the Zimbra Admin Portal, type below URL in Web Browser
https://mail.xyz.com:7071/
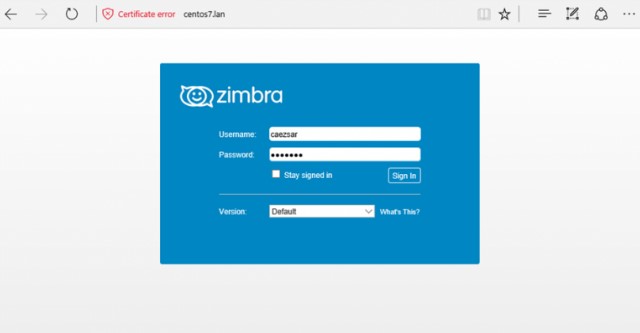
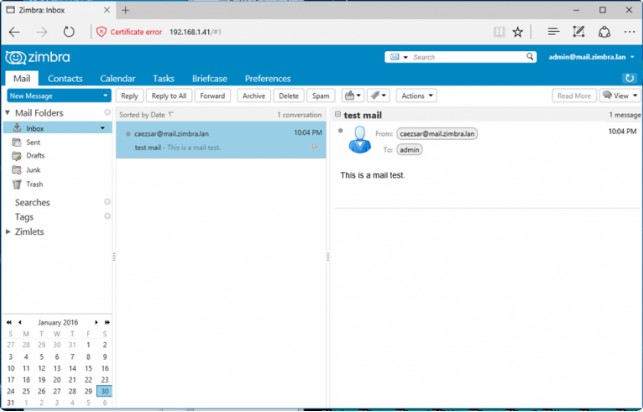
To access Zimbra Mail Web Client, type the following URL in the browser
https://mail.xyz.com.com
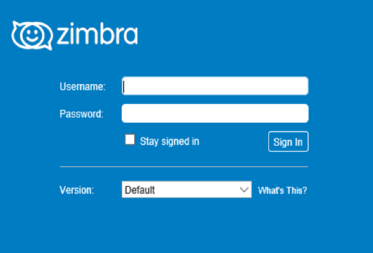
Enter Your Username And PassWord
Note: For both the URLs we can use user name as “admin” and password that we set during the installation
Step:6) Troubleshooting Zimbra Services and Logs
There can be some scenarios where some zimbra services might be stopped, to find zimbra services status from command line, run the following command,
[root@mail ~]# su - zimbra
Last login: Sun Oct  7 14:59:48 IST 2018 on pts/0
[zimbra@mail ~]$ zmcontrol status
Host mail.xyz.com
        amavis                  Running
        antispam                Running
        antivirus               Running
        dnscache                Running
        imapd                   Running
        ldap                    Running
        logger                  Running
        mailbox                 Running
        memcached               Running
        mta                     Running
        opendkim                Running
        proxy                   Running
        service webapp          Running
        snmp                    Running
        spell                   Running
        stats                   Running
        zimbra webapp           Running
        zimbraAdmin webapp      Running
        zimlet webapp           Running
        zmconfigd               Running
[zimbra@mail ~]$
To restart the Zimbra Services use the following command,
               [zimbra@mail ~]$ zmcontrol restart
Host mail.xyz.com
        Stopping zmconfigd...Done.
        Stopping imapd...Done.
        Stopping zimlet webapp...Done.
        Stopping zimbraAdmin webapp...Done.
        Stopping zimbra webapp...Done.
        Stopping service webapp...Done.
        Stopping stats...Done.
        Stopping mta...Done.
        Stopping spell...Done.
        Stopping snmp...Done.
        Stopping cbpolicyd...Done.
        Stopping archiving...Done.
        Stopping opendkim...Done.
        Stopping amavis...Done.
        Stopping antivirus...Done.
        Stopping antispam...Done.
        Stopping proxy...Done.
        Stopping memcached...Done.
        Stopping mailbox...Done.
        Stopping logger...Done.
        Stopping dnscache...Done.
        Stopping ldap...Done.
Host mail.xyz.com
        Starting ldap...Done.
        Starting zmconfigd...Done.
        Starting dnscache...Done.
        Starting logger...Done.
        Starting mailbox...Done.
        Starting memcached...Done.
        Starting proxy...Done.
        Starting amavis...Done.
        Starting antispam...Done.
        Starting antivirus...Done.
        Starting opendkim...Done.
        Starting snmp...Done.
        Starting spell...Done.
        Starting mta...Done.
        Starting stats...Done.
        Starting service webapp...Done.
        Starting zimbra webapp...Done.
        Starting zimbraAdmin webapp...Done.
        Starting zimlet webapp...Done.
        Starting imapd...Done.
[zimbra@mail ~]$
All the log files for Zimbra server are kept under the folder “/opt/zimbra/log”


Leave a comment